
Bounce Pro 14ft Trampoline Instructions: A Comprehensive Guide
Welcome! This guide provides detailed instructions for assembling and safely enjoying your Bounce Pro 14ft Trampoline․ Carefully read this manual before use, ensuring proper setup and adherence to all safety guidelines for a fun experience․
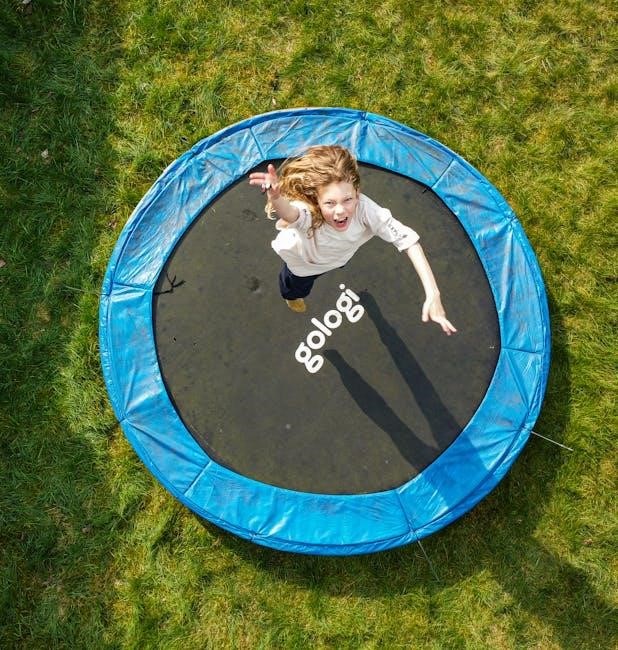
The Bounce Pro 14ft Trampoline is engineered to deliver hours of active fun and exercise for the entire family․ Designed with both safety and enjoyment in mind, this trampoline boasts a robust frame and high-quality materials, ensuring durability and a secure bouncing experience․ It’s a fantastic addition to any backyard, promoting physical activity and outdoor play․
This model, specifically the 14ft size, offers ample bouncing space while remaining suitable for a variety of garden sizes․ The trampoline is built to withstand a weight capacity of 130kg (286lbs), making it appropriate for children and adults alike – always adhering to user restrictions, of course․
Many models include an exciting Interactive Electron Shooter Game, adding an extra layer of engagement and competition․ However, regardless of features, understanding the assembly process and safety precautions outlined in this manual is crucial․ Proper installation and responsible use are key to maximizing enjoyment and minimizing risk․ Refer to model numbers TR-0119ESA-168 or TR-0119ESB-168 for specific details․
Safety Precautions Before Assembly

Prioritize safety! Before beginning assembly of your Bounce Pro 14ft Trampoline, carefully review these crucial precautions․ Ensure the chosen location is level and clear of any obstructions – trees, fences, rocks, or underground utilities․ A soft landing surface, like grass or wood chips, is recommended․

Adult supervision is mandatory during both assembly and use․ Never allow children to assemble the trampoline themselves․ Inspect all parts for damage before starting; do not use damaged components․ Be mindful of potential pinch points during assembly․
Weather conditions are also vital․ Bounce only when the jumping mat is dry, and avoid use in windy conditions․ Gusty or severe winds pose a significant hazard․ Limit the number of users on the trampoline at any given time to prevent collisions and overloading․ Familiarize yourself with proper bouncing techniques – flexing knees upon landing is essential for shock absorption and injury prevention․ Keep this manual accessible for future reference․
Unboxing and Parts Inventory
Carefully unpack all components of your Bounce Pro 14ft Trampoline, taking inventory against the parts list included in this manual․ It’s recommended to unbox on a protected surface, like a tarp or cardboard, to prevent scratching or damage to the parts․
The package should contain the trampoline frame sections, legs, springs, jumping mat, safety pad, enclosure net components (poles, rings, netting), a doorway, and potentially an interactive electron shooter game (depending on the model – TR-0119ESA-168 or TR-0119ESB-168)․
Verify that you have all listed items․ If anything is missing or damaged, do not proceed with assembly․ Contact customer support at 1-866-370-2131 or visit www․sportspowerltd․net for assistance․ Organize the parts into logical groups to streamline the assembly process․ Familiarizing yourself with each component now will save time and frustration later․ Keep all packaging materials until assembly is complete and you’ve confirmed all parts are present and functional․
Frame Assembly – Step-by-Step
Begin by laying out the galvanized steel frame pieces on a level surface․ Connect the frame sections using the provided joining pins and clips, ensuring a secure and flush connection at each joint․ Double-check that all pins are fully inserted and locked into place․
The frame will typically consist of curved sections that form the circular shape․ Work methodically around the circle, adding each section until the complete frame is assembled․ Ensure the frame maintains its circular form throughout the process; avoid forcing connections․
Once the frame is fully connected, inspect all joints again for tightness and security․ A properly assembled frame is crucial for the trampoline’s stability and safety․ Refer to the diagrams in this manual for visual guidance․ Take your time and ensure each step is completed correctly before moving on to the next phase of assembly․
Leg Assembly and Attachment
The Bounce Pro 14ft Trampoline utilizes ‘U’ shaped legs for stability․ Begin by attaching the leg pieces to the frame using the bolts and washers provided․ Ensure the legs are oriented correctly, with the wider opening facing downwards to provide a stable base․
Tighten the bolts securely with the included tools, but avoid over-tightening, which could damage the frame or leg components․ Each leg should be firmly attached to the frame at designated connection points․
Once all legs are attached, carefully flip the trampoline frame upright․ Inspect each leg to confirm it is making solid contact with the ground․ If the ground is uneven, adjust the legs as needed to ensure the frame is level and stable․ A level trampoline is essential for safe bouncing․
Double-check all bolts for tightness after the initial setup and periodically throughout the trampoline’s lifespan․
Spring Installation – Correct Technique
Spring installation requires careful attention to ensure even tension and a safe bouncing experience․ Begin by positioning the trampoline frame and jumping mat side-by-side․ Using the spring tool (often a ‘T’ shaped metal hook), attach one end of a spring to a frame ring attachment point․
Then, carefully stretch the spring and hook the other end onto a mat D-ring․ Repeat this process, working your way around the frame, installing springs diagonally opposite each other․ This cross-pattern ensures even distribution of tension․
Important: Never attempt to install springs with your bare hands; the spring tool is essential to prevent injury․ Ensure each spring is securely seated in both the frame and mat attachments․
Once all springs are attached, double-check each one for proper placement and tension․ Consistent spring tension is crucial for a balanced and safe bounce․ Avoid any loose or improperly attached springs․
Jumping Mat Attachment
With all springs securely in place, carefully position the jumping mat onto the trampoline frame․ Ensure the V-rings on the mat align precisely with the spring attachments on the frame․ This step requires patience and may benefit from assistance․
Double-check that each spring is correctly connected to both the mat’s D-rings and the frame’s attachment points․ A visual inspection around the entire circumference is vital․ The mat should lie flat and centered on the frame, with even tension across all springs․
Caution: Avoid standing on the mat during this process․ The springs are under tension and could pose a hazard․ Once the mat is fully attached, gently test the bounce in several areas to confirm stability and evenness․
If any springs appear loose or unevenly stretched, re-adjust them using the spring tool․ A properly attached jumping mat is fundamental to a safe and enjoyable trampoline experience․
Safety Pad Installation – Ensuring Coverage
The safety pad is crucial for protecting jumpers from falling onto the frame and springs․ Begin by unfolding the pad and positioning it over the trampoline frame, ensuring it completely covers the springs and frame edges․
Most Bounce Pro 14ft trampoline pads attach using straps or Velcro closures․ Securely fasten each strap, working your way around the entire circumference of the trampoline․ Ensure the straps are tightly secured to prevent the pad from shifting during use․
Important: Verify that there are no gaps between the pad and the frame, and that the springs are fully concealed․ The pad should provide continuous, even coverage․ Regularly inspect the straps for wear and tear, replacing them as needed․
Proper installation is vital for safety․ A well-secured safety pad significantly reduces the risk of injury․ Double-check all attachments before allowing anyone to use the trampoline․ Consistent inspection is key to maintaining a safe bouncing environment․
Enclosure Net Assembly – Pole Attachment

Begin the enclosure net assembly by attaching the U-shaped poles to the trampoline frame․ These poles provide the structural support for the net․ Typically, they connect to designated slots or brackets around the trampoline’s perimeter․
Secure each pole firmly using the provided bolts and washers, tightening them with a wrench or appropriate tool․ Ensure all poles are upright and evenly spaced․ Important: Do not overtighten, as this could damage the frame or poles․
Once the poles are securely attached, carefully unfold the enclosure net․ The net usually has sleeves or loops designed to slide over the poles․ Start at one pole and work your way around the trampoline, gently guiding the net over each pole․
Double-check that the net is properly seated on each pole before proceeding․ A secure pole attachment is fundamental to the enclosure’s effectiveness, preventing jumpers from falling off the trampoline․ Consistent inspection of these connections is crucial․
Enclosure Net Attachment to Jumping Mat
With the enclosure net sleeves secured over the poles, the next step is attaching the net to the jumping mat․ Locate the net’s attachment points – these are usually loops or clips designed to connect to the spring cover’s V-rings or directly to the mat itself․
Using the provided S-hooks or clips, carefully connect each attachment point on the net to its corresponding point on the jumping mat․ Work systematically around the entire circumference of the trampoline, ensuring even tension distribution․
Important: Ensure all clips are fully closed and securely fastened․ A loose connection could compromise the safety of the enclosure․ Regularly inspect these connections for wear and tear or accidental disengagement․
Once all attachment points are secured, gently test the net’s stability by applying light pressure at various points․ The net should be taut and securely connected to both the poles and the jumping mat, creating a safe bouncing environment․
Doorway Installation and Security
The doorway provides controlled access to the trampoline, crucial for safety․ Locate the doorway components – typically a zippered entrance and supporting frame pieces․ Insert the doorway frame into the designated opening in the enclosure net, ensuring it fits snugly and securely․
Most Bounce Pro models utilize a zipper and buckle system․ Fully zip up the doorway when not in use․ Crucially, always double-check the buckle is fastened․ This prevents accidental openings during bouncing․ Regularly inspect the zipper for damage or obstructions․
Important Safety Note: Never allow multiple users to enter or exit the trampoline simultaneously through the doorway․ This can create a collision hazard․ Teach children to use the doorway responsibly and always under supervision․
Periodically inspect the doorway frame for any signs of bending, cracking, or corrosion․ Replace any damaged components immediately․ A secure doorway is a vital component of a safe trampoline experience, preventing falls and injuries․
Interactive Electron Shooter Game Setup (If Applicable)
If your Bounce Pro 14ft Trampoline includes the Interactive Electron Shooter Game, setup requires careful attention to wiring and target placement․ Begin by identifying all game components: targets, wiring harness, control panel, and power adapter․ Refer to the separate game-specific instruction manual (TR-0119ESA-168 or TR-0119ESB-168) for detailed diagrams․
Attach the targets to the enclosure net using the provided clips, ensuring they are securely fastened and evenly spaced․ Connect the wiring harness from each target to the control panel, following the color-coded system․ Improper wiring can damage the system․
Mount the control panel to a trampoline leg using the included brackets․ Connect the power adapter to the control panel and a suitable power outlet․ Caution: Ensure the power adapter is protected from the elements․
Test the game functionality before allowing use; If targets aren’t registering, double-check wiring connections․ Always supervise children while they are using the interactive game feature․
Weight Limit and User Restrictions
Safety is paramount! The Bounce Pro 14ft Trampoline has a maximum weight capacity of 130 kg (286 lbs)․ Exceeding this limit can compromise the trampoline’s structural integrity, leading to potential injury․ Strictly adhere to this weight restriction․
Only one person should be on the trampoline at any given time․ Multiple users significantly increase the risk of collisions and injuries․ Adult supervision is crucial, especially for younger children․
Children under the age of 6 should not use the trampoline without direct and constant adult supervision․ Ensure they understand basic safety rules and proper bouncing techniques․
Individuals with pre-existing medical conditions, such as back problems or heart conditions, should consult a physician before using the trampoline․ Pregnant women should avoid trampoline use altogether․
Discourage somersaults and flips, as these maneuvers are inherently dangerous and can result in serious head or neck injuries․ Prioritize safe bouncing practices to ensure a fun and secure experience․
Proper Bouncing Techniques
Mastering the bounce! Begin by getting accustomed to the feel of your Bounce Pro 14ft Trampoline․ Start with small, controlled bounces, focusing on maintaining your balance and body position․ Avoid attempting advanced maneuvers until comfortable․
Bend your knees upon landing to absorb the impact and reduce stress on your joints․ This flexing action is crucial for a safe and enjoyable bouncing experience․ Keep your head and eyes up, maintaining awareness of your surroundings․

Bounce in the center of the jumping mat for optimal spring and stability․ Avoid bouncing near the edges or safety pads, as this can increase the risk of falling off․ Control your bounce height; higher isn’t always better․
Stop bouncing by bending your knees as your feet come down․ This controlled stop minimizes impact and prevents unnecessary strain․ Avoid attempting to jump off the trampoline while it’s still in motion․
Practice good posture and maintain a slight bend in your knees throughout your bouncing session․ Focus on controlled movements and avoid reckless or impulsive actions․
Maintenance and Inspection Schedule
Regular upkeep is key! To ensure the longevity and safety of your Bounce Pro 14ft Trampoline, implement a consistent maintenance schedule․ Inspect the trampoline before each use, checking for any signs of damage or wear․
Weekly: Examine the jumping mat for tears or holes․ Verify that all springs are securely attached and haven’t become stretched or rusted․ Check the safety pad for proper coverage and secure attachment․ Inspect the enclosure net for rips or tears․
Monthly: Tighten all bolts and connections on the frame and legs․ Ensure the frame remains stable and level․ Clean the jumping mat with a mild soap and water solution, removing any debris․
Seasonally: A thorough inspection is vital․ Check the springs for fatigue and replace if necessary․ Inspect the UV resistance of the safety pad and net, replacing if faded or brittle․ Store the trampoline properly during harsh weather conditions․
Address any issues immediately․ Prompt repairs prevent minor problems from escalating into safety hazards․ Keep a record of inspections and maintenance performed․
Storage Instructions – Protecting Your Trampoline
Proper storage extends the life of your Bounce Pro 14ft Trampoline! When not in use, especially during inclement weather or the off-season, careful storage is crucial to prevent damage and maintain safety․
Disassembly: While complete disassembly isn’t always necessary, removing the enclosure net and safety pad is highly recommended․ This reduces wind resistance and prevents UV degradation․ Store these components in a dry, sheltered location․
Frame Protection: If leaving the frame assembled, secure it firmly to the ground to prevent movement during strong winds․ Consider covering the frame with a waterproof tarp to protect against rust and corrosion․
Mat Care: The jumping mat should be cleaned and thoroughly dried before storage․ Avoid folding the mat tightly, as this can create creases․ Store it flat or loosely rolled in a dry area․
Springs & Hardware: Store springs and all hardware in a sealed container to prevent loss and corrosion․ Regularly inspect stored components for any signs of deterioration before reassembly․
Troubleshooting Common Issues
Addressing problems ensures continued safe fun with your Bounce Pro 14ft Trampoline! Here are solutions to frequently encountered issues․
Spring Issues: If a spring becomes detached, use a spring puller tool (not included) for safe reattachment․ Never attempt to reattach springs by hand․ Regularly check all springs for proper tension and hook placement․
Frame Instability: Ensure all frame connections are tight․ If wobbling persists, verify the trampoline is on level ground․ Adjust leg placement as needed․
Mat Slippage: Confirm the jumping mat is securely attached to the springs․ Check for any tears or damage to the mat’s spring attachment points․

Enclosure Net Problems: Inspect the enclosure net for tears or damage․ Ensure all net attachments to the poles and mat are secure․ Replace damaged netting immediately․
Wind Concerns: In high winds, the trampoline can become a hazard․ Disassemble the enclosure or secure the entire unit to the ground․ Always prioritize safety! If issues persist, contact customer support․
Contact Information for Support
Need assistance with your Bounce Pro 14ft Trampoline? Our dedicated support team is here to help ensure a safe and enjoyable experience․ We understand that assembly or usage questions may arise, and we’re committed to providing prompt and effective solutions․
For immediate assistance, please call our toll-free helpline at 1-866-370-2131․ Our knowledgeable representatives are available during business hours to address your concerns․
Alternatively, you can visit our comprehensive support website at www․sportspowerltd․net․ Here, you’ll find frequently asked questions (FAQs), detailed troubleshooting guides, and downloadable resources, including replacement parts information․
Email Support: For non-urgent inquiries, please email us at support@sportspowerltd․net․ We strive to respond to all email requests within 24-48 hours․

Please have your trampoline model number (BouncePro 14ft Trampoline Steelflex Pro) readily available when contacting support to expedite the assistance process․ We value your satisfaction!
Warranty Information
Your Bounce Pro 14ft Trampoline is backed by a limited warranty, demonstrating our commitment to quality and customer satisfaction․ This warranty covers defects in materials and workmanship under normal residential use․
Frame Components: The trampoline frame is warranted for a period of one (1) year from the date of original purchase against bending or breaking under normal use․
Jumping Mat & Safety Pad: The jumping mat and safety pad are warranted for six (6) months from the date of original purchase against defects in materials and workmanship․
Enclosure Net & Springs: The enclosure net and springs are warranted for three (3) months from the date of original purchase․
Warranty Exclusions: This warranty does not cover damage resulting from misuse, abuse, accidents, modifications, improper assembly, or normal wear and tear․ Proof of purchase is required for all warranty claims․
To initiate a warranty claim, please contact our customer support team at 1-866-370-2131 or visit www․sportspowerltd․net for detailed instructions․