Converting from an automatic to a manual transmission, often called a manual swap, is a significant undertaking. It involves replacing the entire drivetrain,
requiring careful planning and execution. This process offers a more engaging driving experience, providing greater control and a direct connection to the vehicle’s power.
The swap necessitates installing a new gearbox, clutch assembly, shifter, and linkage, demanding mechanical skill and potentially professional assistance. Understanding the costs,
challenges, and benefits is crucial before embarking on this automotive transformation, ranging from $1,000 to $10,000 depending on the vehicle and labor.
Overview of the Conversion Process
The manual swap process is multifaceted, beginning with meticulous disassembly of the existing automatic transmission system. This includes removing the automatic gearbox, torque converter, and associated components. Next, preparation involves installing a new clutch assembly, flywheel, and the chosen manual transmission.
Crucially, the shifter mechanism and linkage must be correctly installed to ensure smooth gear changes. Electrical system integration is vital, potentially requiring ECU tuning to accommodate the manual transmission. Furthermore, driveshaft modifications may be necessary to match the new transmission’s length.
Finally, thorough testing and adjustment are essential to confirm proper operation. This entire process, while rewarding, demands significant mechanical expertise and attention to detail, often spanning several days or weeks depending on experience and vehicle complexity. It’s a complete drivetrain overhaul.
Why Choose a Manual Transmission?
Opting for a manual transmission transforms the driving experience, offering a heightened sense of control and engagement. Drivers appreciate the direct connection to the engine and the ability to select gears precisely, enhancing performance and responsiveness. Moreover, manual transmissions often provide better fuel efficiency compared to automatics, though modern automatics are closing the gap.
Enthusiasts frequently cite the increased driving enjoyment as a primary reason for the swap, relishing the tactile feedback and the skill involved in mastering clutch and shifter coordination. Additionally, manual transmissions can be more reliable and less expensive to repair than complex automatic systems.
Ultimately, the decision hinges on personal preference, but for those seeking a more involved and rewarding driving experience, a manual swap is a compelling choice, offering a purist’s connection to the machine.

Cost Breakdown of the Swap
Understanding the financial implications is vital; a manual swap’s cost ranges significantly, from $1,000 to over $10,000, encompassing parts, labor, and potential unforeseen expenses.
Parts Costs: A Detailed Estimate
Estimating parts costs for an automatic-to-manual swap requires a detailed breakdown. A compatible manual transmission itself can range from $500 to $3,000, depending on its condition and source. The clutch assembly, including the pressure plate, disc, and throw-out bearing, typically costs between $200 and $800.
Don’t forget the flywheel, potentially needing replacement or resurfacing, adding another $100 to $500. The shifter mechanism and linkage, crucial for operation, can range from $150 to $600. Additional expenses include a new pedal assembly (around $100-$300), potentially a driveshaft modification ($200-$600), and various smaller components like hardware, fluids, and potentially a new rear transmission mount ($50-$200). Realistically, budgeting $1,000 to $3,000 for parts alone is a prudent approach.
Transmission and Gearbox Expenses
The core expense lies in sourcing a compatible manual transmission and gearbox. Used transmissions can be found for as little as $500, but condition is paramount; a rebuild might be necessary, adding $800 to $2,500 to the cost. New transmissions, offering reliability, range from $1,500 to $3,000 or more, depending on the vehicle and transmission type.
Consider shipping costs, potentially exceeding $200 for larger, heavier units. Gearbox-specific components, like input shafts or output flanges, might be required for compatibility, adding $100 to $400. Thorough research is vital to ensure the chosen transmission is a direct fit or requires minimal modification. Prioritize quality and reliability to avoid future issues and ensure a smooth driving experience.
Clutch Assembly and Components
A complete clutch assembly is essential, encompassing the clutch disc, pressure plate, and throw-out bearing. Expect to spend between $200 and $600 for a quality kit, varying with brand and vehicle. Performance clutches, offering increased clamping force, can exceed $800. The flywheel must also be considered; resurfacing costs around $50-$150, while a new flywheel ranges from $200 to $500.
Don’t overlook the pilot bearing or bushing, a small but crucial component costing $20-$50. Alignment tools, necessary for proper installation, are inexpensive, around $20. Choosing the right clutch kit, matched to your vehicle’s power output, is vital for longevity and performance. Budget accordingly for these often-overlooked, yet critical, components.
Shifter Mechanism and Linkage Costs
The shifter assembly and associated linkage represent a significant portion of the manual swap cost. A complete shifter mechanism, including the shifter itself, cables or rods, and mounting hardware, typically ranges from $150 to $500, depending on the vehicle and desired quality. Short-throw shifters, offering quicker gear changes, can cost $300-$600 or more.
Linkage components, whether cable or rod-based, require careful selection to ensure precise engagement. Expect to spend $50-$200 on linkage parts. Modifications to the transmission tunnel may be necessary for proper shifter placement, adding to the cost. Don’t forget bushings; upgrading these improves shifter feel and reduces slop, costing around $30-$100.
Labor Costs: Professional vs. DIY
Choosing between professional installation and a DIY approach dramatically impacts the overall cost. Professional installation fees can range from $3,000 to over $10,000, depending on the vehicle’s complexity and shop rates. This includes diagnosis, parts installation, and post-swap checks. A complete and professional conversion demands significant expertise.
The DIY route saves on labor but requires substantial mechanical skill, tools, and time – potentially 20-40+ hours. While parts costs remain consistent, unforeseen issues can arise, increasing the time commitment. Incorrect installation can lead to costly repairs. Carefully assess your abilities before attempting a DIY manual swap; it’s a full-blown drivetrain transplant.
Professional Installation Fees
Engaging a professional shop for an automatic-to-manual swap offers expertise but comes at a cost. Expect to pay anywhere from $3,000, potentially exceeding $10,000, depending on the vehicle’s make and model. Labor rates vary geographically and by shop specialization. Complex conversions, like those in all-wheel-drive vehicles, naturally incur higher fees.
The fee typically covers diagnosis, parts installation (transmission, clutch, shifter), linkage adjustments, and crucial ECU tuning. Some shops offer package deals, while others bill hourly. Obtaining multiple quotes is essential. Remember that unforeseen complications during the swap can lead to additional labor charges, so budget accordingly for potential surprises.
DIY Labor Time and Considerations
Undertaking a manual swap yourself saves on labor costs, but demands significant time and mechanical aptitude. Expect the project to consume several weekends, potentially extending to weeks, depending on your experience and vehicle complexity. Thorough research and a detailed plan are paramount.
You’ll need a well-equipped workspace, including jacks, stands, and specialized tools. Disassembly, installation, and adjustments require patience and precision. Be prepared for challenges – unexpected issues often arise. Prioritize safety; improper installation can compromise vehicle functionality and safety. Consider the learning curve and potential for costly mistakes before committing to a DIY approach.
Hidden Costs and Potential Issues
Beyond the core components, several hidden costs can inflate the manual swap budget. ECU tuning and programming are often necessary to ensure compatibility between the engine and the new transmission, potentially adding several hundred dollars. Unexpected repairs and modifications frequently emerge during the process; worn parts or unforeseen fitment issues can necessitate additional purchases.
Driveshaft adjustments or replacements might be required, and the pedal box may need modification. Be prepared for potential electrical gremlins and the possibility of needing specialized tools. Thorough inspection and proactive problem-solving are crucial to avoid escalating costs and delays. Budgeting for contingencies is highly recommended.
ECU Tuning and Programming
Switching from an automatic to a manual transmission often necessitates ECU tuning and programming. The engine control unit (ECU) manages various vehicle functions, and an automatic transmission’s parameters differ significantly from a manual setup. Retuning ensures optimal performance, fuel efficiency, and prevents error codes.
Without proper tuning, the engine may not operate correctly, potentially leading to reduced power or even damage. This process involves adjusting parameters like fuel delivery, ignition timing, and throttle response to match the manual transmission. Costs can range from a few hundred to over a thousand dollars, depending on the vehicle and the complexity of the tuning required. Professional tuning is highly recommended for accurate and reliable results.
Unexpected Repairs and Modifications
Manual swaps rarely proceed without unforeseen issues. Unexpected repairs and modifications are common, adding to the overall cost and complexity. During disassembly, you might discover corrosion, damaged components, or parts that require replacement. These hidden problems can significantly inflate the budget.
Furthermore, modifications beyond the core swap might be necessary. This could include adjustments to the exhaust system, driveshaft alterations, or even strengthening the chassis to handle the increased power and driver input. Budgeting an extra 10-20% of the estimated cost is prudent to cover these potential surprises. Thorough inspection and preparation are key to minimizing unexpected expenses during the conversion process.

Essential Parts Required for the Swap
A successful manual swap demands sourcing a compatible transmission, clutch kit, flywheel, shifter assembly, and linkage. These components are vital for a functional conversion.
Sourcing a Compatible Manual Transmission
Finding the correct manual transmission is paramount for a successful swap. Compatibility hinges on your vehicle’s make, model, and engine type; a direct fit is ideal, but often requires searching junkyards, online marketplaces, or specialized transmission suppliers.
Consider factors like gear ratios, which impact performance and fuel economy. Researching forums and communities dedicated to your vehicle can reveal common swap choices and potential challenges. Ensure the transmission is in good working order before purchase, checking for wear or damage.
Sometimes, transmissions from similar vehicle models or even different years can work, but may necessitate adapter plates or modifications. Thorough research and verification are crucial to avoid costly mistakes and ensure a smooth installation process.
Clutch Kit Selection
Choosing the right clutch kit is vital for reliable performance and longevity after a manual swap. Kits typically include the clutch disc, pressure plate, throw-out bearing, and alignment tool. Consider your driving style and vehicle’s power output when selecting a kit.
For stock engines and daily driving, an OEM-replacement kit is often sufficient. However, if you’ve modified your engine or plan to, a performance clutch with a higher clamping force may be necessary to handle the increased torque.
Pay attention to the clutch disc’s diameter and spline count, ensuring compatibility with your transmission and flywheel. Quality brands offer better materials and durability, justifying the investment for a long-lasting and dependable system.
Flywheel Considerations
When converting to a manual transmission, a flywheel compatible with both the engine and the chosen clutch is essential. Automatic flexplates cannot be used with a manual clutch setup; a proper flywheel is required for smooth operation and reliable engagement.
Flywheel weight impacts engine responsiveness and driving feel. Lighter flywheels allow for quicker revving but can make the car more sensitive and harder to control at low speeds. Heavier flywheels offer more stability but reduce acceleration.
Ensure the flywheel is balanced to prevent vibrations. Some aftermarket flywheels are dual-mass, reducing vibrations further, but are typically more expensive. Inspect the flywheel surface for damage before installation, and resurface if necessary.
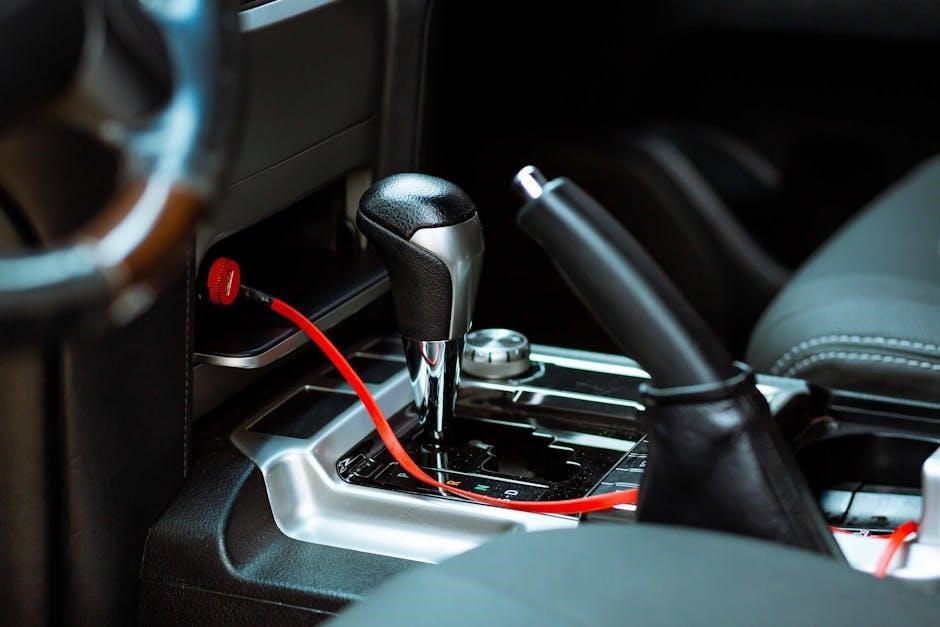
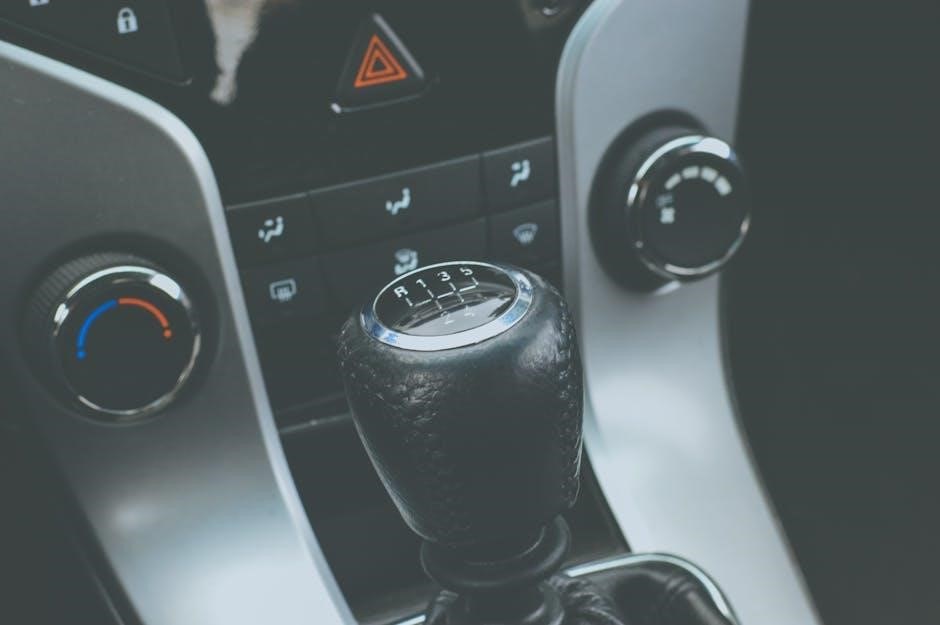
Shifter Assembly and Linkage
The shifter assembly and linkage are crucial for precise gear selection during a manual swap. Compatibility with the transmission and the vehicle’s floor console is paramount; aftermarket options often require console modifications.
Linkage types vary – cable-operated or direct linkage. Cable systems offer flexibility in shifter placement, while direct linkage provides a more connected feel. Ensure all linkage components are in good condition and properly lubricated for smooth operation.
Proper adjustment of the shifter linkage is vital to prevent binding or imprecise shifting. Incorrect adjustment can lead to difficulty selecting gears or even damage to the transmission. Take time to carefully align and adjust the linkage according to the manufacturer’s specifications.

Step-by-Step Conversion Guide (Overview)
The conversion involves careful disassembly, transmission installation, clutch setup, and shifter linkage. Thorough preparation, precise installation, and diligent adjustments are key to a successful swap.
Preparation and Disassembly
Before beginning, gather all necessary parts – transmission, clutch, flywheel, shifter – and tools. Disconnect the battery to prevent electrical shorts. Drain the automatic transmission fluid carefully, and then remove the driveshaft, exhaust components, and any obstructing parts.
Next, disconnect all wiring and linkages connected to the automatic transmission. Support the engine securely, as removing the automatic transmission will leave it unsupported. Carefully unbolt and remove the automatic transmission, taking note of the mounting points and any associated hardware. Inspect the bellhousing for damage and clean the mating surface for the new transmission. Prepare the area for the manual transmission installation, ensuring sufficient space and accessibility.
Transmission Installation
With the automatic transmission removed, carefully position the manual transmission using a transmission jack. Align the input shaft with the engine’s pilot bearing and gently push the transmission into place. Securely bolt the transmission to the engine, ensuring proper alignment and torque specifications are followed.
Double-check all mounting points and hardware. Reconnect the driveshaft, ensuring it’s properly balanced and secured. Install the new flywheel and clutch assembly, carefully aligning the clutch disc and pressure plate. Verify proper clearance and functionality before proceeding. This step is critical for smooth operation and preventing damage.
Clutch Installation and Adjustment
Begin by installing the flywheel, ensuring it’s clean and properly torqued to the engine’s specifications. Carefully align the clutch disc with the pilot bearing and install the pressure plate, again adhering to torque guidelines. Secure the pressure plate evenly to avoid warping.
Next, install the throw-out bearing and ensure smooth operation of the clutch fork. Adjust the clutch pedal free play according to the vehicle’s service manual – typically between 1/2 to 1 inch. Improper adjustment can lead to slipping or difficulty shifting. Test the clutch engagement point and make fine adjustments as needed for optimal performance.
Shifter and Linkage Installation
Mount the shifter assembly into the transmission tunnel, ensuring proper alignment and secure fastening. Connect the shift linkage, carefully adjusting the rods and joints to achieve precise gear selection. Verify that each gear engages smoothly and without binding.
Pay close attention to the linkage geometry, as incorrect adjustments can result in missed shifts or difficulty finding gears. Test the shifter through all gear positions, making necessary adjustments to the linkage until smooth and accurate operation is achieved. A well-adjusted shifter is crucial for an enjoyable driving experience after the manual swap.
Potential Challenges and Solutions
Manual swaps often present electrical integration issues, driveshaft modifications, and pedal box changes. Careful planning, research, and potentially professional help are vital for success.
Electrical System Integration
Integrating the manual transmission into the vehicle’s electrical system presents unique challenges. Automatic transmissions often utilize sensors and solenoids for gear selection and operation, which are absent in a manual setup. Removing these components requires careful disconnection and, in some cases, re-wiring or utilizing plug removal.
The vehicle’s Engine Control Unit (ECU) may need reprogramming or tuning to account for the change, as it originally received signals from the automatic transmission. Failure to address this can result in warning lights, incorrect shift points, or even engine performance issues. Some vehicles may require a completely new ECU or a standalone engine management system. Thorough research into your specific vehicle’s electrical architecture is paramount before beginning the swap.
Driveshaft Modifications
Adapting the driveshaft is often necessary when swapping from an automatic to a manual transmission. Automatic transmissions typically have a longer output shaft than their manual counterparts, potentially causing the driveshaft to be too short after the swap. This can lead to vibrations, driveline issues, and premature wear.
Solutions include shortening the existing driveshaft, sourcing a driveshaft specifically designed for the manual transmission, or utilizing an adapter. Careful measurement and professional modification are crucial to ensure proper alignment and functionality. Ignoring this step can compromise the vehicle’s handling and safety. It’s vital to verify the U-joint angles and ensure they fall within acceptable limits post-modification.
Pedal Box Changes
A crucial aspect of an automatic to manual swap is modifying or replacing the pedal box. Automatic vehicles lack a clutch pedal, necessitating its installation. This often involves sourcing a complete pedal box assembly from a manual transmission version of the same vehicle. Alternatively, aftermarket pedal assemblies are available, offering a direct fitment solution.
Installation requires careful attention to ensure proper placement and functionality; Brake pedal positioning may also need adjustment to accommodate the new clutch pedal. Correctly mounting the pedal box is vital for safe and comfortable operation. Improper installation can lead to difficulty engaging the clutch or interference with other controls, impacting the driving experience.
Legal and Safety Considerations
Modifying your vehicle requires adherence to local laws and safety standards. Inspections may be needed post-swap, and insurance coverage could be affected. Prioritize safety
during installation, using proper tools and precautions.
Vehicle Inspection Requirements
Post-conversion, many jurisdictions require a vehicle inspection to ensure the manual swap meets safety and emissions standards. These inspections verify the proper functioning of all newly installed components, including the clutch, shifter, and linkage, ensuring they operate smoothly and securely.
Inspectors will also check for any potential safety hazards created by the modification, such as improperly secured wiring or compromised structural integrity. Documentation of the parts used and the work performed is often required. Failing inspection can lead to fines or the inability to legally operate the vehicle on public roads.
Research your local Department of Motor Vehicles (DMV) or equivalent agency to understand specific requirements. Some areas may necessitate a full vehicle compliance test, while others may only require a limited inspection focused on the modified drivetrain.

Insurance Implications
Modifying your vehicle with a manual swap can significantly impact your insurance coverage. It’s crucial to inform your insurance provider about the alteration, as failing to do so could invalidate your policy in the event of an accident.
Insurance companies may view a manual transmission as a performance upgrade, potentially increasing your premium. Conversely, some insurers might offer discounts if the swap enhances the vehicle’s anti-theft features. The change could also affect the vehicle’s assessed value for comprehensive or collision coverage.
Obtain quotes from multiple insurers to compare rates and coverage options after the swap. Be prepared to provide detailed documentation of the modification, including receipts and installation records.
Safety Precautions During Installation
Performing a manual transmission swap involves working with heavy components and potentially hazardous tools. Always disconnect the vehicle’s battery before beginning any work to prevent electrical shocks or accidental activation of systems.
Utilize jack stands to securely support the vehicle; never rely solely on a jack. Wear safety glasses and gloves to protect your eyes and hands from fluids and sharp edges. Be mindful of pinch points when handling the transmission and other drivetrain parts.
Properly dispose of all fluids, like transmission fluid and coolant, according to local regulations. If you’re unfamiliar with automotive repair, seek assistance from a qualified mechanic to ensure a safe and correct installation.

Resources and Further Information
Numerous online forums and technical manuals offer invaluable support for manual swaps. Professional automotive shops specializing in transmissions can also provide expert guidance and assistance.
Online Forums and Communities
Engaging with online forums and communities dedicated to automotive modifications is incredibly beneficial when considering a manual swap. These platforms serve as a central hub for enthusiasts who have already undertaken similar projects, offering a wealth of practical knowledge and troubleshooting advice.
Forums allow you to connect with individuals experienced in specific vehicle makes and models, providing tailored guidance for your particular swap; You can find detailed build threads, parts recommendations, and solutions to common challenges. Active communities often host dedicated sections for manual transmission conversions, facilitating focused discussions and knowledge sharing.
Websites like Reddit (r/cars, r/mechanicadvice) and dedicated car-specific forums are excellent starting points. Remember to utilize the search function before posting questions, as your issue may have already been addressed. Participating respectfully and contributing your own experiences will further enhance the community’s collective knowledge.
Technical Manuals and Guides
Accessing comprehensive technical manuals and guides is paramount for a successful automatic-to-manual conversion. Factory service manuals provide detailed diagrams, torque specifications, and step-by-step procedures specific to your vehicle. These resources are invaluable for understanding the intricacies of the drivetrain and ensuring proper installation.
Haynes and Chilton manuals offer more generalized guidance, often covering a range of vehicle models. However, they can still be helpful for understanding basic mechanical principles and procedures. Online databases and subscription services, like AlldataDIY, provide access to a vast library of repair information.
Supplement these resources with dedicated guides specifically focused on manual swaps. These guides often detail common pitfalls and offer solutions tailored to the conversion process, ensuring a smoother and more informed experience.
Professional Automotive Shops
Engaging a reputable professional automotive shop is a viable option, especially for those lacking extensive mechanical experience. Shops specializing in performance or custom modifications are often best equipped to handle a manual swap. Expect labor costs to range significantly, from $3,000 to exceeding $10,000, depending on the vehicle and shop rates.
Obtain multiple quotes and thoroughly vet potential shops, checking their experience with similar conversions and customer reviews. Discuss the project scope in detail, including parts sourcing and potential unforeseen issues. A skilled technician can ensure proper installation, ECU tuning, and address any electrical or mechanical challenges.
Professional installation offers peace of mind and minimizes the risk of costly errors, guaranteeing a safe and reliable conversion.