
Nikon D700 Operating Manual: A Comprehensive Guide
Welcome! This manual expertly guides you through the Nikon D700‚ unlocking its full potential for masterful control and detailed photographic exploration.
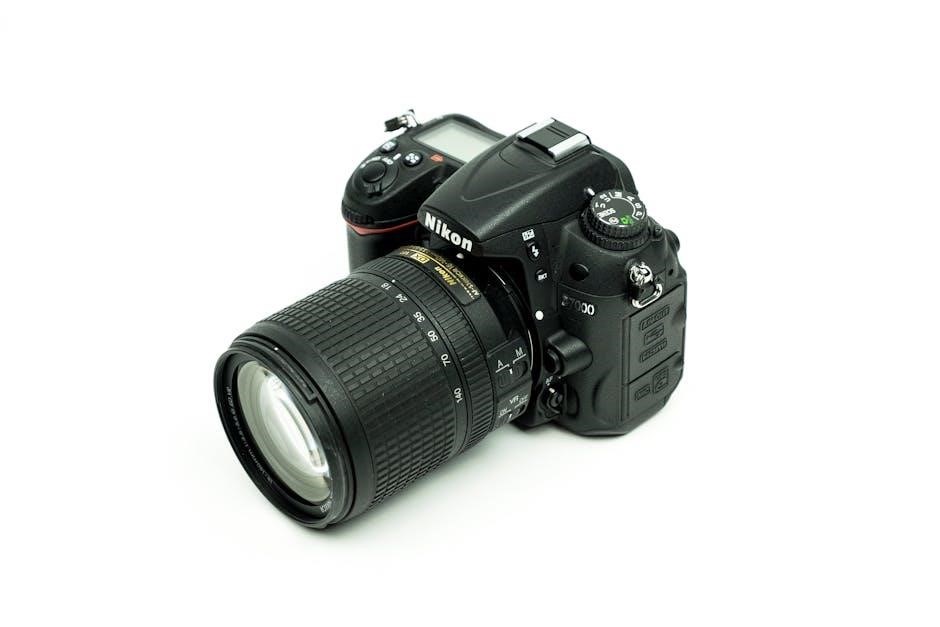
Welcome to the world of the Nikon D700! This full-frame DSLR represents a sweet spot in Nikon’s professional lineup‚ offering exceptional image quality and robust performance in a relatively compact body. This manual serves as your comprehensive companion‚ designed to help you quickly become proficient with all its features.
The D700 is renowned for its 12.1-megapixel FX-format sensor‚ delivering stunning detail and dynamic range. Whether you’re a seasoned professional or an enthusiastic amateur‚ understanding its controls and capabilities is key to unlocking its full potential. This guide will empower you with the knowledge to confidently navigate the camera’s functionalities and achieve remarkable photographic results. Prepare to master its masterful control!
Unboxing and Initial Setup
Congratulations on your new Nikon D700! Carefully unpack the box‚ ensuring all included accessories are present: the camera body‚ battery‚ battery charger‚ strap‚ USB cable‚ and documentation. Begin by inserting the battery and charging it fully – a full charge is crucial for initial setup.
Next‚ attach the strap for secure handling. Insert a compatible memory card (SD card) into the designated slot. Power on the camera and follow the on-screen prompts to set the language‚ date‚ and time. Register your camera online for warranty benefits and access to exclusive resources. Familiarize yourself with the basic layout before proceeding to more advanced settings.
Understanding the Camera Body & Controls
Explore the D700’s design! This section details the physical layout‚ button functions‚ and dial operations for intuitive and efficient camera handling.
Front and Rear Panel Overview
Front Panel: The Nikon D700’s front panel houses essential controls. You’ll find the lens mount‚ allowing attachment of compatible NIKKOR lenses‚ and the multi-function button‚ customizable for quick access to frequently used settings. The depth-of-field preview button enables visualization of the aperture’s effect. Additionally‚ the sub-command dial facilitates adjustments during shooting.
Rear Panel: The rear panel is dominated by the large‚ high-resolution LCD screen for image review and menu navigation. Surrounding the screen are buttons for playback‚ menu access‚ image magnification‚ and information display; The eight-way controller allows precise menu selection and focus point adjustments. The ‘i’ button provides instant access to commonly used settings. Finally‚ the card slot accommodates CompactFlash memory cards for image storage.
Top Panel Controls and Functions
Essential Controls: The Nikon D700’s top panel provides immediate access to core shooting functions. The main command dial controls shutter speed in Manual and Shutter-Priority modes‚ and adjusts settings in other modes. The mode dial selects shooting modes – Auto‚ Program‚ Aperture-Priority‚ Shutter-Priority‚ Manual‚ and more. The release mode dial governs single shot‚ continuous shooting‚ and self-timer options.
Additional Features: The exposure compensation dial allows quick adjustments to brightness. The metering mode button selects the desired metering method. The white balance button provides access to preset and custom white balance settings. The ISO button enables adjustment of the camera’s sensitivity to light. Finally‚ the shutter button initiates image capture.
Button Customization Options
Personalized Control: The Nikon D700 offers extensive button customization via the Custom Setting menu. This allows photographers to tailor the camera’s operation to their individual shooting style and preferences. You can reassign functions to various buttons‚ streamlining workflow and improving efficiency.
Key Customizations: Commonly customized buttons include the AF-ON button for autofocus activation‚ the depth-of-field preview button‚ and various function buttons. Customization extends to the control dials‚ allowing assignment of different functions based on shooting mode. Saving custom settings to user presets ensures quick recall of preferred configurations. This feature empowers users to truly personalize their D700 experience.

Mastering the Exposure System
Exposure Control: Understand the interplay of aperture‚ shutter speed‚ and ISO to achieve perfectly exposed images with your Nikon D700‚ unlocking creative potential.
Aperture‚ Shutter Speed‚ and ISO Relationship
The Exposure Triangle: Mastering exposure on your Nikon D700 hinges on understanding the interconnectedness of aperture‚ shutter speed‚ and ISO. Aperture controls the lens opening‚ influencing depth of field and light intake – wider apertures (lower f-numbers) create shallow depth of field and let in more light.

Shutter speed dictates how long the sensor is exposed to light; faster speeds freeze motion‚ while slower speeds allow more light but risk blur. ISO measures the sensor’s sensitivity to light; higher ISOs are useful in low light but can introduce noise.
These three elements work together. Adjusting one necessitates compensating with others to maintain proper exposure. For example‚ increasing ISO allows for faster shutter speeds or smaller apertures in dim conditions. Experimentation is key to achieving desired creative effects and optimal image quality with your D700.
Exposure Modes: Auto‚ Program‚ Aperture-Priority‚ Shutter-Priority‚ Manual
Nikon D700 Exposure Control: Your D700 offers diverse exposure modes for varying levels of control. Auto Mode simplifies shooting‚ letting the camera handle all settings. Program Mode (P) allows some control over ISO‚ white balance‚ and flash‚ while the camera sets aperture and shutter speed.
Aperture-Priority (A or Av) lets you choose the aperture‚ and the camera selects the corresponding shutter speed. Shutter-Priority (S or Tv) allows you to set the shutter speed‚ with the camera adjusting the aperture.
Manual Mode (M) grants full control over both aperture and shutter speed‚ ideal for challenging lighting or specific creative visions. Understanding each mode empowers you to capture images precisely as intended‚ maximizing the D700’s capabilities.
Metering Modes: Matrix‚ Center-Weighted‚ Spot
Nikon D700 Metering Explained: The D700’s metering system accurately measures light to determine optimal exposure. Matrix Metering analyzes the entire frame‚ ideal for general scenes. It’s a balanced approach‚ suitable for most situations. Center-Weighted Metering prioritizes the center of the frame‚ useful when your subject is centrally located.
Spot Metering measures light from a very small area‚ perfect for challenging lighting or when precise exposure of a specific subject is crucial. Selecting the correct metering mode ensures properly exposed images‚ even in difficult conditions. Experiment to master each mode’s strengths.

Focusing and Image Stabilization
Achieve Sharpness: Explore autofocus modes‚ area selection‚ and tracking features for precise focusing. Utilize Vibration Reduction (VR) lenses for enhanced stability.
Autofocus Modes and Settings
Nikon’s Autofocus System: The D700 boasts a sophisticated autofocus system with various modes tailored to different shooting scenarios. Single-servo AF (AF-S) is ideal for stationary subjects‚ locking focus when the shutter button is half-pressed. Continuous-servo AF (AF-C) excels with moving subjects‚ continuously adjusting focus as they move. Automatic-servo AF (AF-A) intelligently switches between AF-S and AF-C based on subject motion.
AF-Area Modes: Select from Single-point AF for precise control‚ Dynamic-area AF which uses surrounding focus points if the initial point loses the subject‚ and Auto-area AF allowing the camera to automatically select focus points. 3D-tracking locks onto a subject and follows its movement across the frame. Experiment with these modes to find what best suits your photographic style and subject matter. Fine-tune AF sensitivity within the Custom Settings menu for optimal performance.
Focus Area Selection and Tracking
Selecting Focus Points: The D700 offers 51 focus points‚ providing extensive coverage across the frame. Use the multi-controller to directly select a single focus point for pinpoint accuracy. Alternatively‚ utilize Dynamic-area AF‚ choosing a cluster of focus points around your initial selection‚ allowing the camera to track a moving subject if it drifts from the primary point.
3D-Tracking Mastery: Engage 3D-tracking mode for continuous subject tracking. Initially‚ acquire focus on your subject using the AF-ON button or half-pressing the shutter. The camera will then intelligently follow its movement. Adjust tracking sensitivity in the Custom Settings menu to optimize responsiveness for various subjects and shooting conditions. Remember to recompose if the subject moves significantly outside the initial focus area.
Understanding Vibration Reduction (VR) with Compatible Lenses
VR Functionality: When using Nikon lenses equipped with Vibration Reduction (VR)‚ the D700 benefits from significantly reduced camera shake‚ enabling sharper images‚ especially in low light or when using slower shutter speeds. VR compensates for angular camera movement‚ improving handheld shooting stability.

VR Modes: Compatible lenses often feature different VR modes. Normal VR provides stabilization during general shooting. Active VR is ideal for situations involving significant camera movement‚ like shooting from a moving vehicle. Tripod VR minimizes vibration when using a tripod – disable VR on a sturdy tripod to avoid potential image degradation. Consult your lens manual for specific VR mode details and optimal settings.
Image Quality and Settings
Optimize your visuals! Explore RAW and JPEG options‚ fine-tune white balance for accurate colors‚ and leverage Picture Control settings for desired image styles.
Image Size and Quality Options (RAW‚ JPEG)
Choosing the right format is crucial. The Nikon D700 offers versatile image capture options‚ primarily RAW and JPEG. RAW files retain all image data captured by the sensor‚ providing maximum flexibility for post-processing adjustments – ideal for professional workflows demanding precise control over color‚ exposure‚ and detail.
JPEG files‚ conversely‚ are compressed‚ resulting in smaller file sizes suitable for immediate use and sharing. Within JPEG‚ you can select various quality levels (Basic‚ Normal‚ Fine‚ and Super Fine)‚ impacting file size and image detail. Higher quality settings preserve more detail but create larger files. Consider your intended use; for critical work‚ RAW is recommended‚ while JPEG suits everyday photography and quick sharing.
White Balance Adjustment and Presets
Accurate color rendition starts with white balance. The Nikon D700 provides extensive white balance control‚ ensuring colors appear natural under diverse lighting conditions. Several presets are available – Auto‚ Incandescent‚ Fluorescent‚ Direct Sunlight‚ Flash‚ Cloudy‚ and Shade – offering quick solutions for common scenarios.
For precise adjustments‚ utilize the Custom White Balance feature. This involves photographing a white or gray card under the prevailing light and instructing the camera to use that as a reference. Fine-tuning is also possible via the Kelvin temperature scale‚ allowing manual adjustment for ultimate color accuracy. Experiment to achieve the desired look and correct any color casts.
Picture Control Settings: Standard‚ Neutral‚ Vivid‚ Monochrome
Shape your images’ personality with Picture Controls. The Nikon D700 offers preset options – Standard‚ Neutral‚ Vivid‚ and Monochrome – to influence color‚ contrast‚ and sharpness directly in-camera. Standard delivers well-balanced results for everyday shooting. Neutral provides a flatter profile‚ ideal for post-processing flexibility.
Vivid boosts saturation and contrast for impactful images‚ while Monochrome creates striking black and white photographs. Each Picture Control is customizable; adjust parameters like sharpness‚ contrast‚ brightness‚ saturation‚ and hue to create personalized settings. Save these custom settings for consistent results across your photography.

Shooting Modes and Features
Explore versatile shooting options! Discover Live View‚ self-timer functions‚ remote release capabilities‚ and the integrated flash for creative control and diverse photographic scenarios.
Live View Shooting and its Advantages
Unlocking Precision: The Nikon D700’s Live View mode offers a unique shooting experience‚ displaying a real-time image on the LCD screen. This is particularly advantageous for situations demanding meticulous focus‚ such as macro photography or when using a tripod.
Enhanced Control & Composition: Live View allows for precise manual focusing‚ utilizing magnification for critical sharpness. It also facilitates careful composition‚ ensuring your subject is perfectly framed. The grid display options further aid in achieving balanced and aesthetically pleasing images.
Silent Capture Potential: In certain scenarios‚ Live View enables silent capture‚ eliminating the sound of the mirror mechanism – ideal for sensitive environments like wildlife photography or performances. Explore the benefits of this feature for discreet and impactful image creation.
Self-Timer and Remote Release Options
Expanding Your Photographic Possibilities: The Nikon D700 provides versatile options for delayed or remote shutter release‚ crucial for self-portraits‚ group photos‚ and minimizing camera shake during long exposures. The built-in self-timer offers customizable delay durations – 2‚ 5‚ 10‚ or 20 seconds – allowing ample time to join the frame.
Remote Control for Precision: For greater control and flexibility‚ consider utilizing a compatible remote release. Wired or wireless remotes eliminate physical contact with the camera‚ preventing unwanted vibrations and ensuring razor-sharp images‚ especially in low-light conditions.
Intervalometer Functionality: Explore advanced remote options with intervalometer capabilities‚ perfect for time-lapse photography‚ capturing gradual changes over extended periods with automated precision.
Using the Built-in Flash and Flash Control
Integrated Illumination: The Nikon D700 features a versatile built-in flash‚ providing supplemental light in various shooting scenarios. It’s ideal for filling shadows‚ adding a touch of brightness‚ or enabling photography in dimly lit environments. Understanding flash modes – TTL‚ Manual‚ and Red-Eye Reduction – is key to optimal results.
Controlling Flash Output: Fine-tune flash intensity using flash exposure compensation‚ adjusting the light output to achieve the desired effect. Explore flash synchronization settings‚ ensuring proper coordination between the flash and shutter speed for balanced exposures.
External Flash Compatibility: The D700 seamlessly integrates with Nikon’s Creative Lighting System‚ allowing for advanced off-camera flash techniques with compatible speedlights.

Menu Navigation and Customization
Explore Settings: Dive into the Nikon D700’s intuitive menu system to personalize camera functions‚ tailoring settings to your unique photographic style and preferences.
Understanding the Nikon D700 Menu System
Navigating the Menus: The Nikon D700’s menu system is logically organized into several tabs‚ each dedicated to specific camera settings. These include Setup‚ Shooting‚ Display‚ Custom Settings‚ and more. Accessing the menu is done via the ‘Menu’ button on the camera’s rear panel.
Menu Structure: Within each tab‚ options are presented in a hierarchical structure. Use the multi-selector to navigate up and down‚ and the right button to enter submenus. The left button returns you to the previous menu.
Customization is Key: Familiarize yourself with the Custom Settings menu‚ as this is where you’ll personalize the camera to your shooting style. Options range from autofocus behavior to button assignments. Don’t hesitate to experiment!
Custom Setting Menu: Personalizing Your Camera
Tailoring to Your Needs: The Custom Setting menu is the heart of personalizing your Nikon D700. It allows you to fine-tune the camera’s behavior to match your shooting preferences. This menu is divided into groups – Autofocus‚ Exposure‚ Display‚ Timing‚ and more – for organized access.
Key Customizations: Explore options like assigning functions to buttons‚ customizing the information displayed in the viewfinder‚ and adjusting the behavior of the autofocus system. Consider setting ‘a1’ for button customization.
Saving Your Settings: Remember to document your custom settings! While the D700 doesn’t offer profile saving‚ noting your choices ensures easy restoration if you reset the camera.
Resetting the Camera to Factory Defaults
Returning to Original Settings: Sometimes‚ extensive customization can lead to unexpected behavior. Resetting your Nikon D700 to factory defaults restores all settings to their original‚ out-of-the-box configuration. This is a useful troubleshooting step or a clean slate for a new setup.
Accessing the Reset Function: Navigate to the Setup menu‚ then select ‘Reset’. You’ll be presented with options to reset all settings or just specific menu groups. Be cautious – this action is irreversible!
Important Note: Resetting does not erase images or videos on your memory card. It only affects the camera’s internal settings. Document your custom settings beforehand to easily reapply them if desired.